
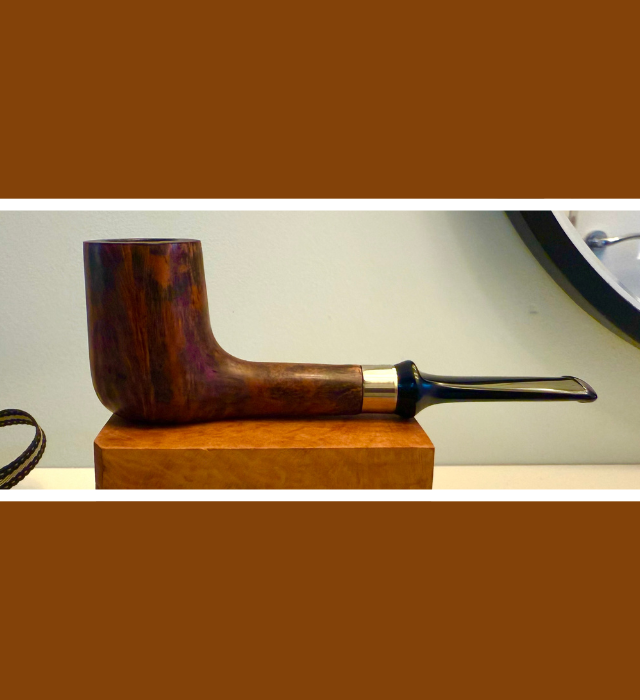
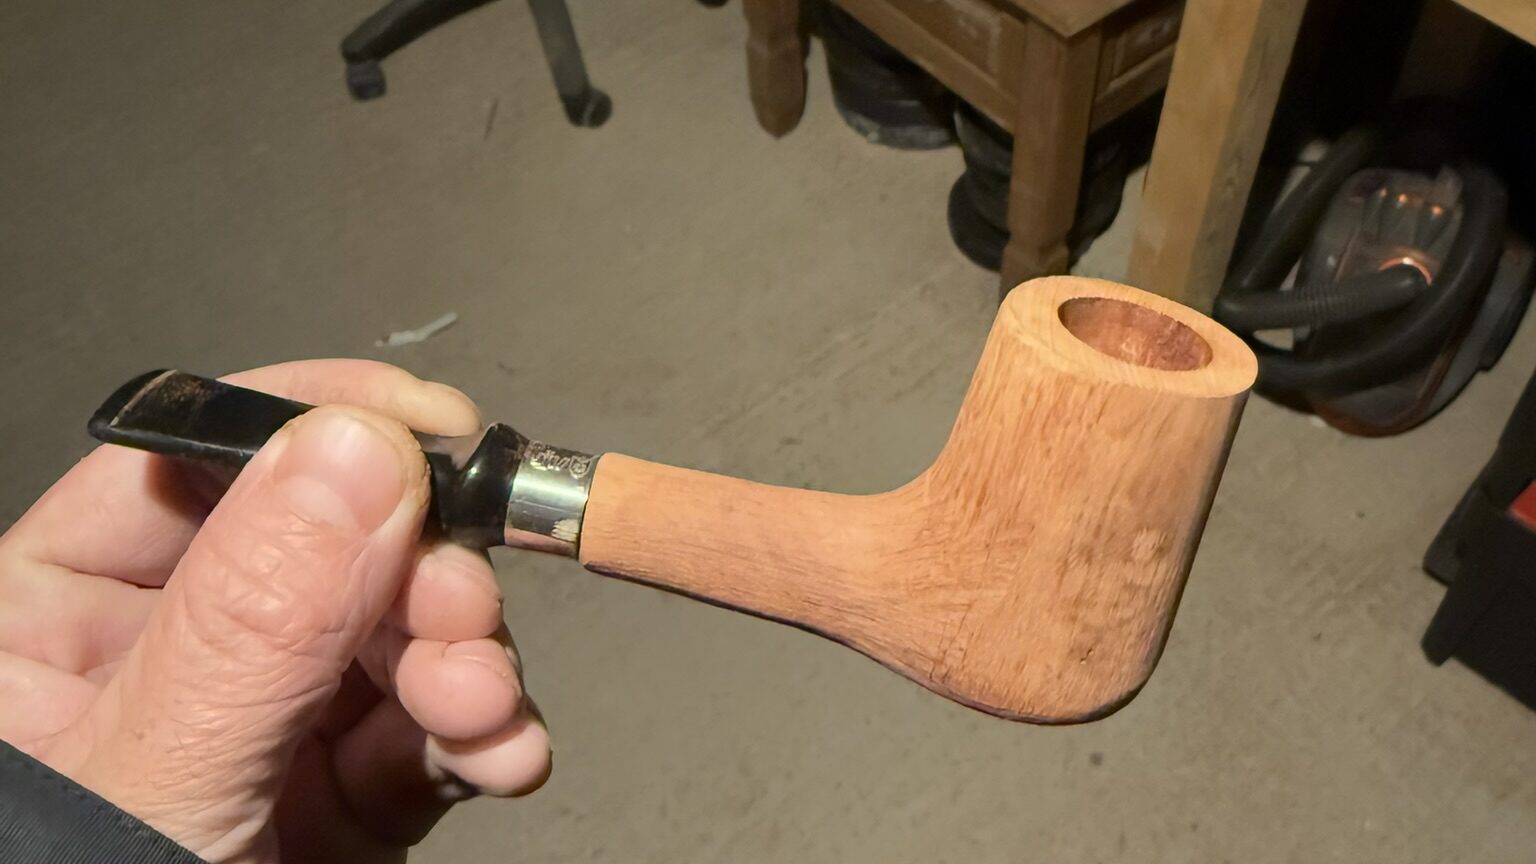
This pipe is the first pipe where the stummel has been completely made by me. I wish I could have also made the mouthpiece, but until I can afford to get a nice little metal lathe that is out of the question. The shape is a Billiard, though I’m sure more experienced carvers will explain how my proportions etc make it NOT a billiard… either way, i’m so happy with how it came out considering it’s my first completely self made stummel. There are a few tool marks shown up by the finishing process which has taught me to double the time i spend sanding during my finishing process!
This is also my first time attempting a contrast stain on a briar pipe, and for my first time I’m pretty happy with how it came out.
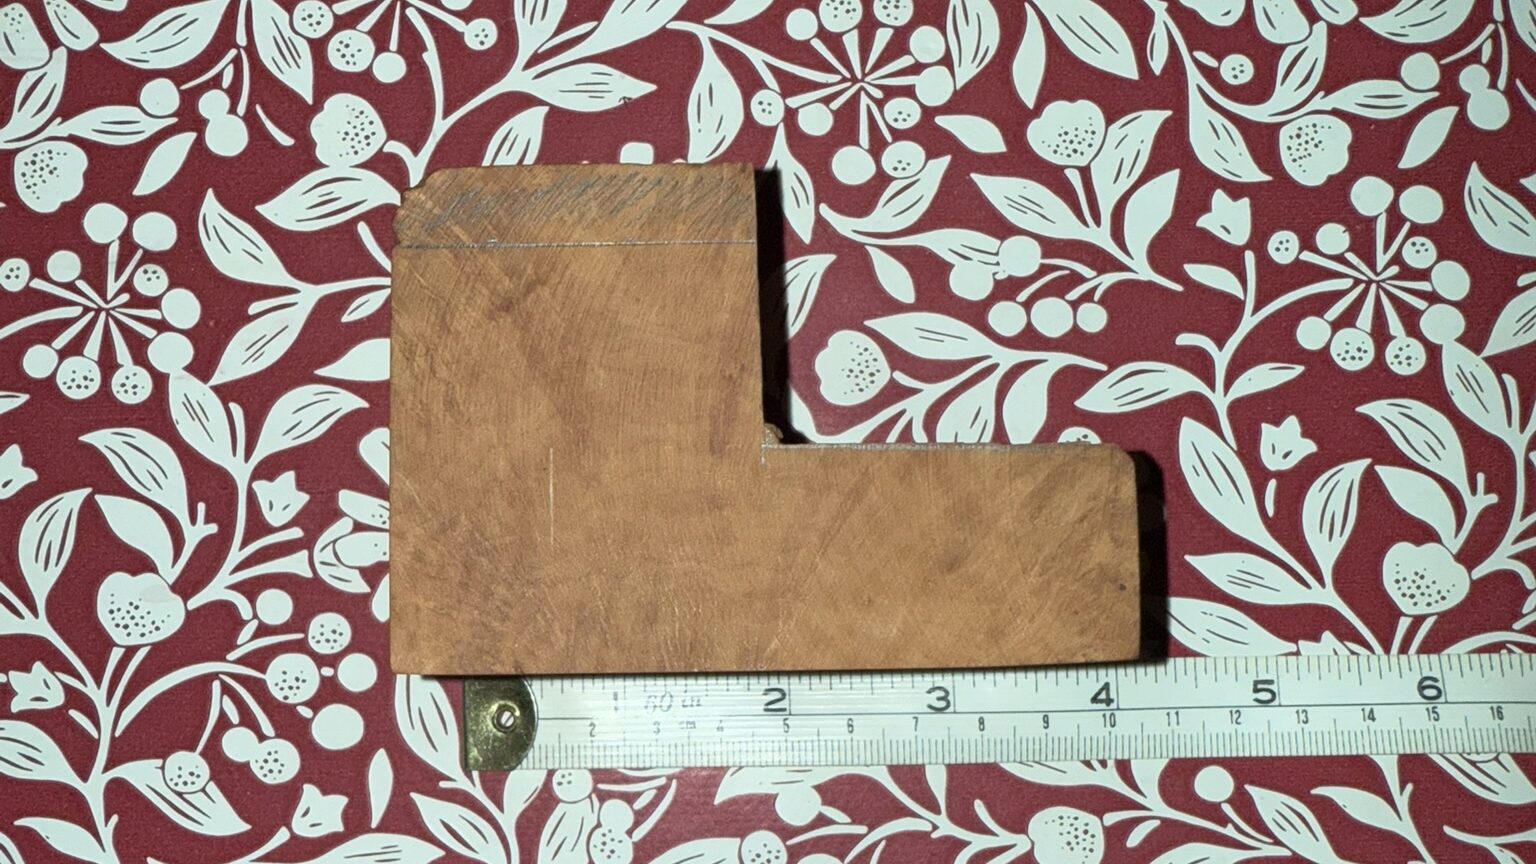
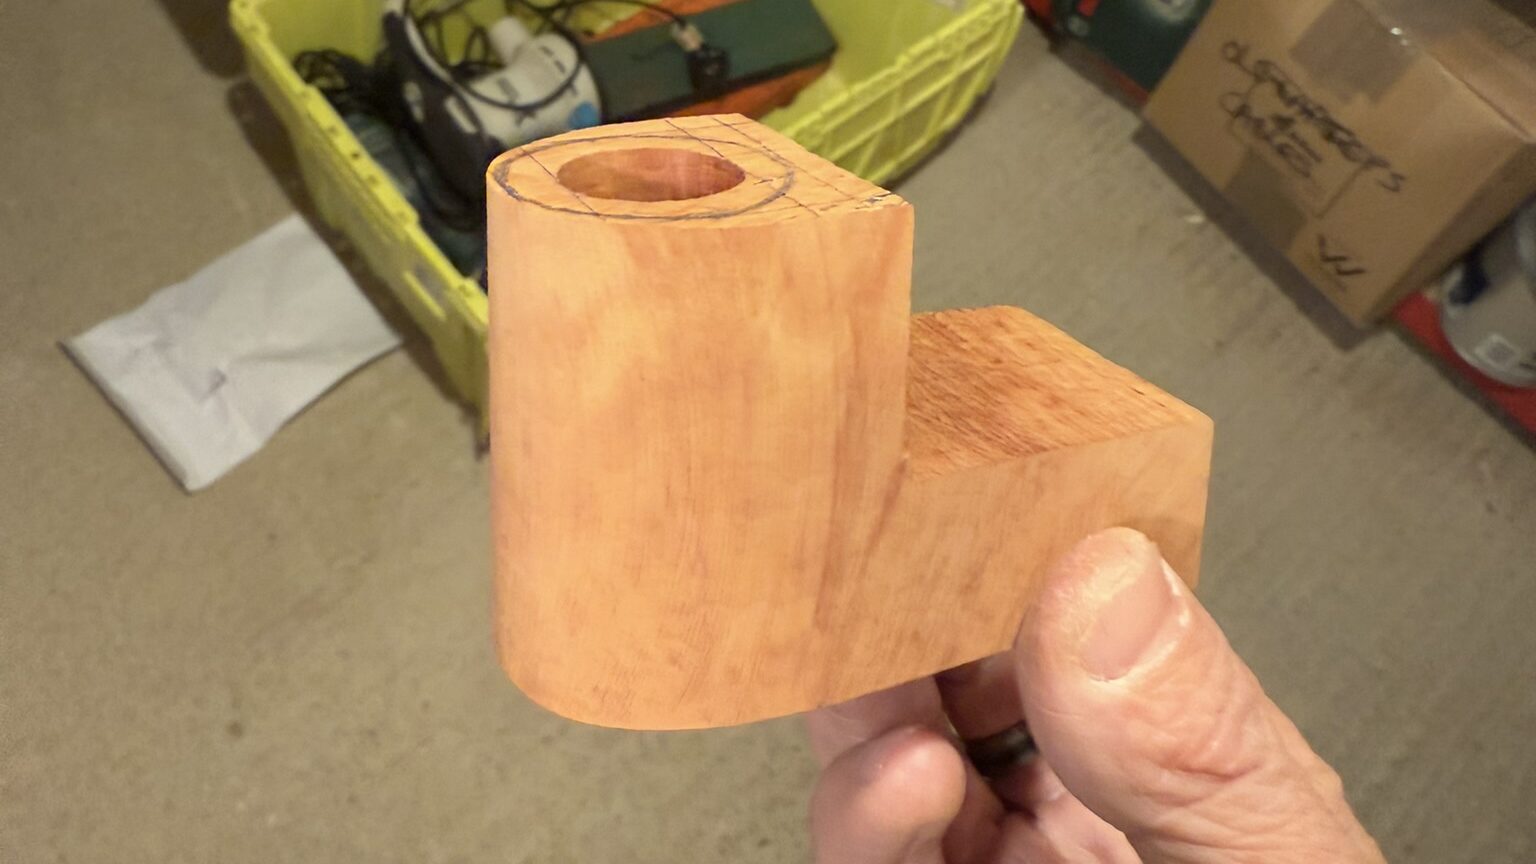
I squared up my block on my 300mm bench sander before cutting it into a billiard ‘L’.
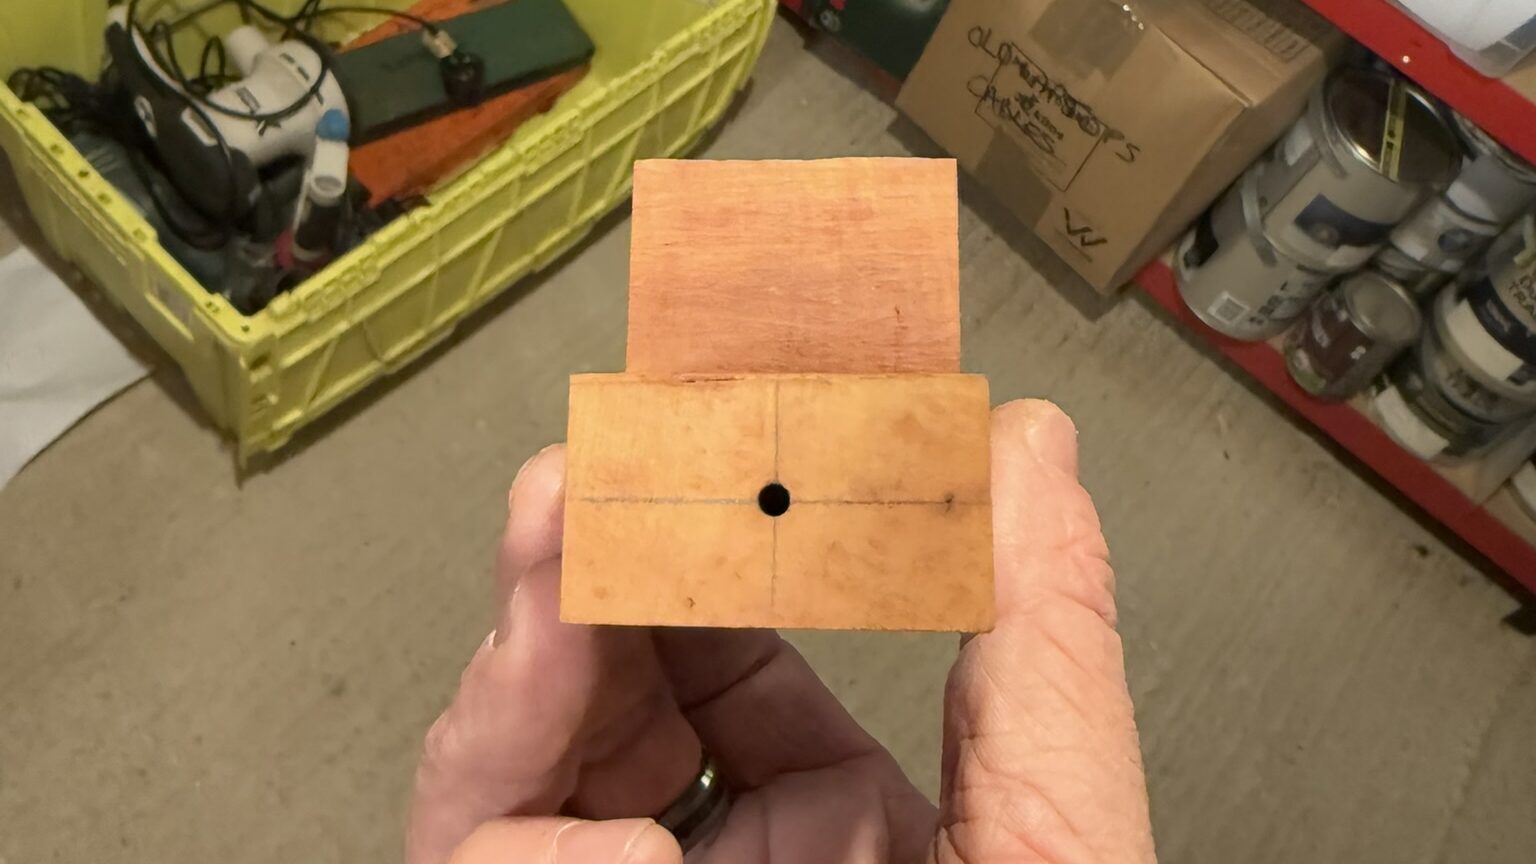

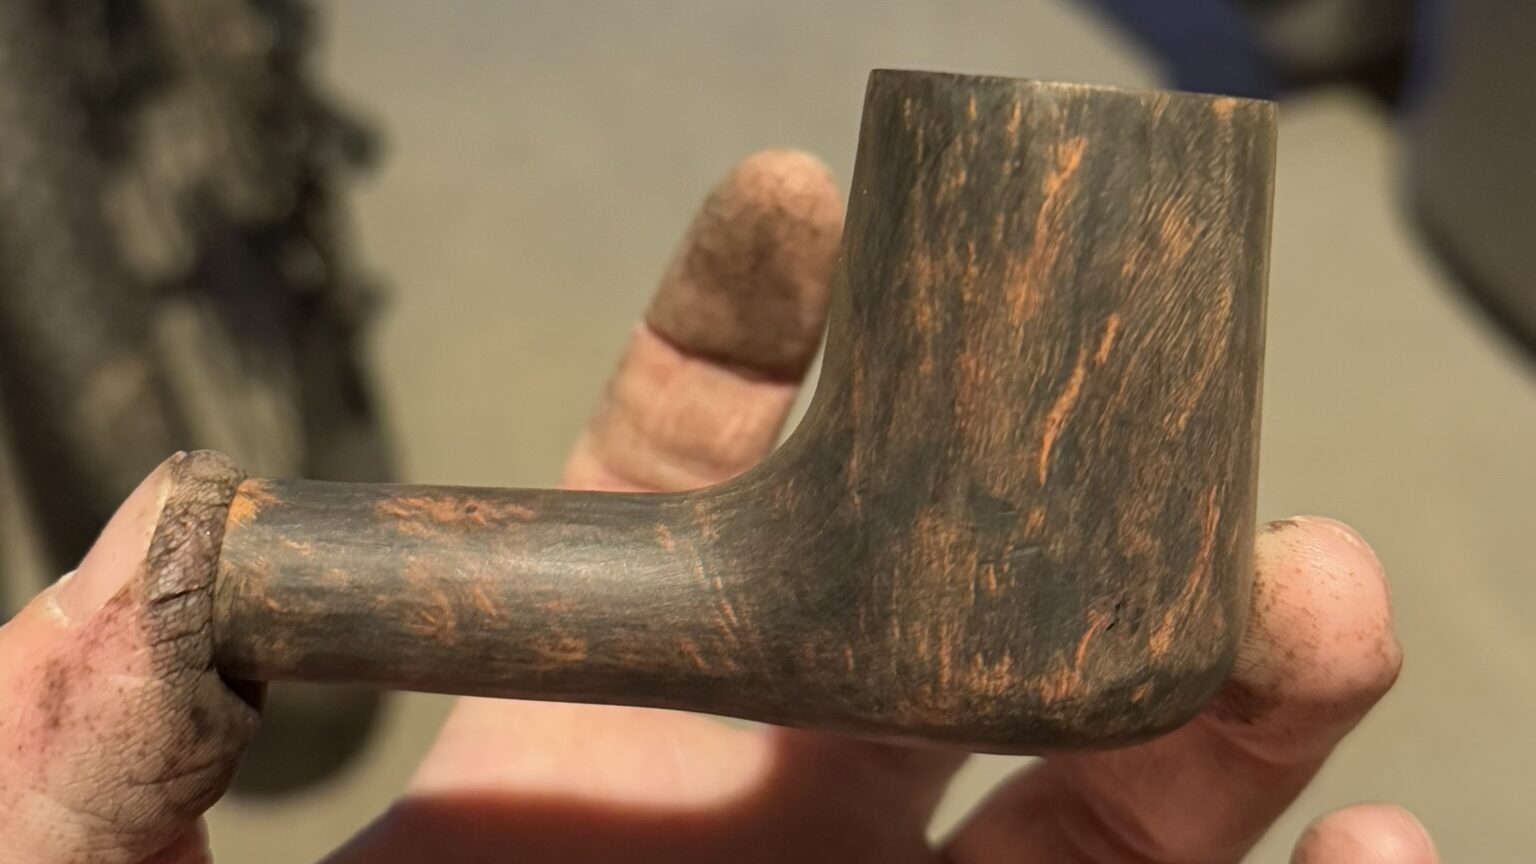
Considering this was my first time ever drilling a stummel, I’m actually very happy with how it came out. The draught hole is off to the side by 1mm or so, but i’m happy with this for a first attempt! I’m using a Bosch PDB40 Drill Press which is pretty good, but as this is a press under £300, there is a little runout, especially with longer bits like that for the draught hole. I’m debating creating a guide to use halfway down the bit to try and keep it as fixed radially as possible when drilling, but as a rookie im unsure if this is something that works. Until – like I mentioned earlier – I can get myself a nice metal lathe, I’m going to have to make do!
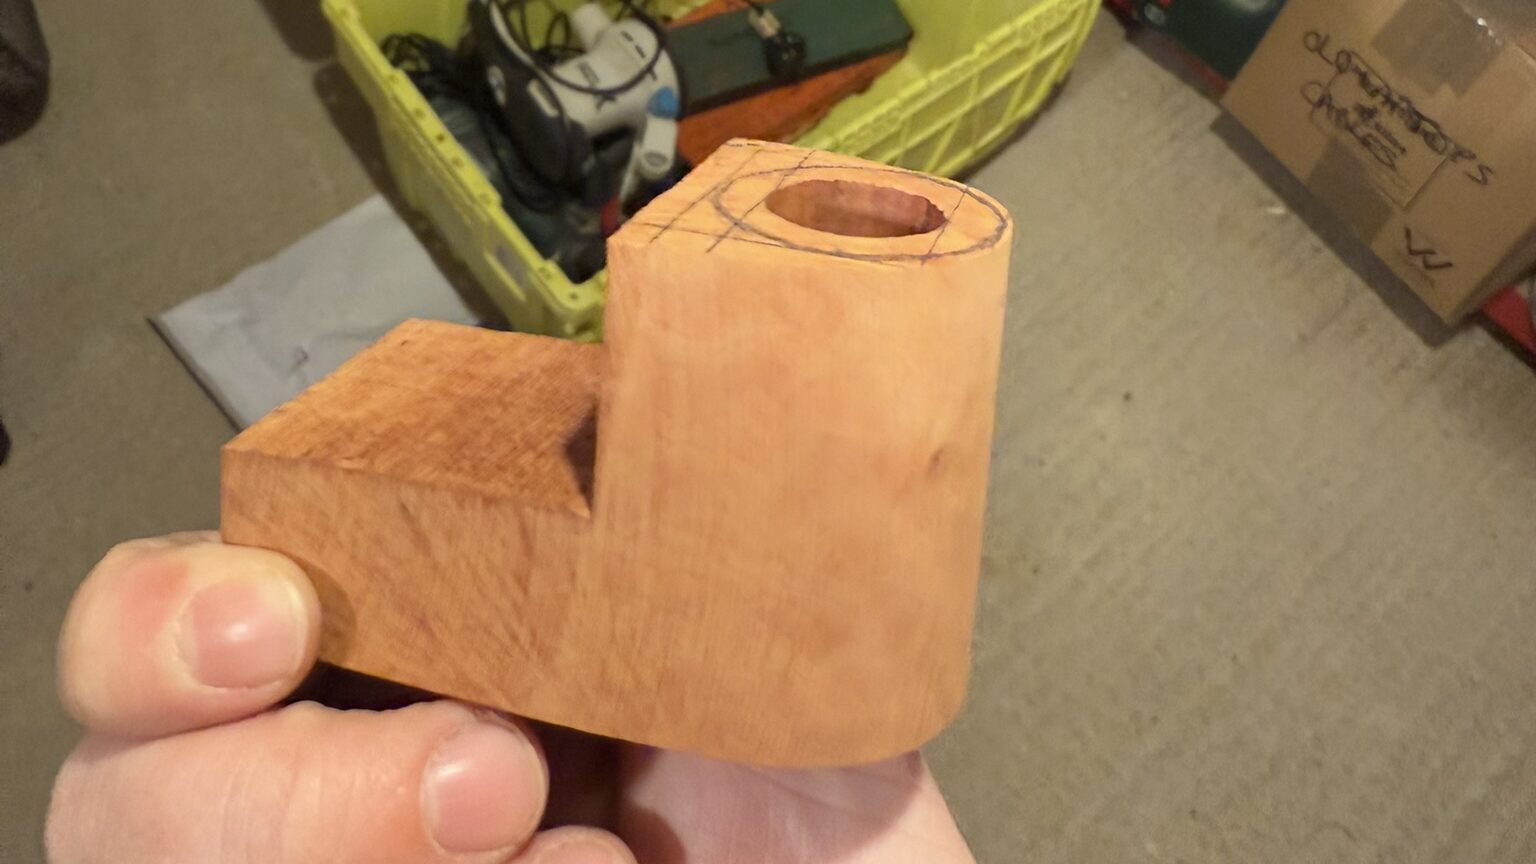
Then it was back to the bench sander to do as much initial shaping as possible before carving further. The bench sander does a great job for rounding these straight chimneys. One note is that i’ll probably move up to 120 grit from 80 grit for shaping on the bench sander, as I find that the 80 leaves deeper grooves that take a bit more effort to remove. Sadly my bench sander’s edges are enclosed so there is only so much shaping i can do on here before having to move onto my Dremel, files and sandpaper.
I then drilled the mortice for the mouthpiece tenon and test fitted on the block, before cutting away the excess material around where the shank would be.
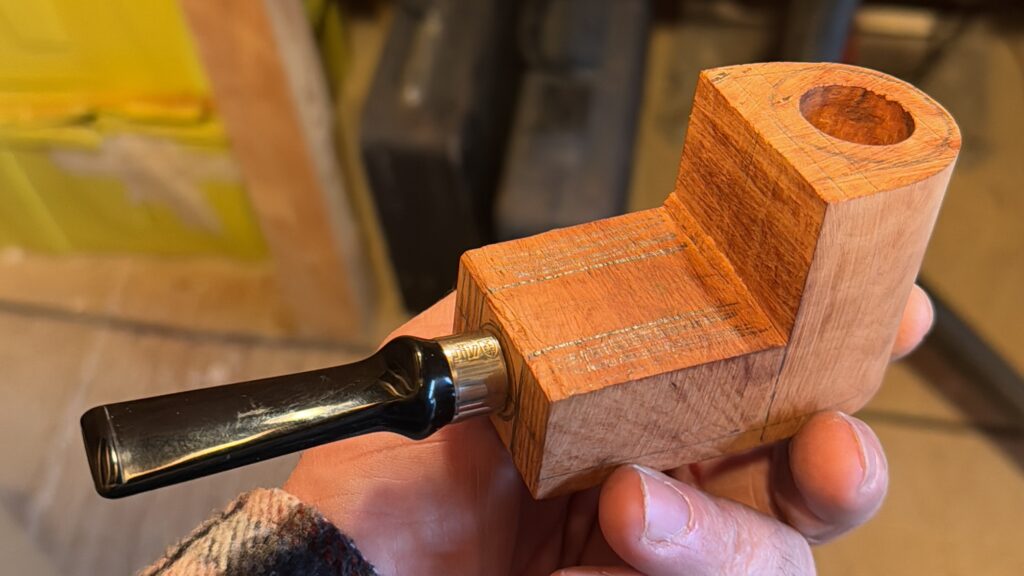
Next was to move onto the Dremel. As i mentioned previously, I am limited with how much shaping I can do on my bench sander, so once I had done all I can there, I started carving more material away using Dremel MAX Carving Bits (mainly the 117DM), I’m still learning Dremel carving technique but found it fairly effective and a very fun way of carving. I also need to experiment more with different RPMs when at this stage as briar tends to scorch a little.
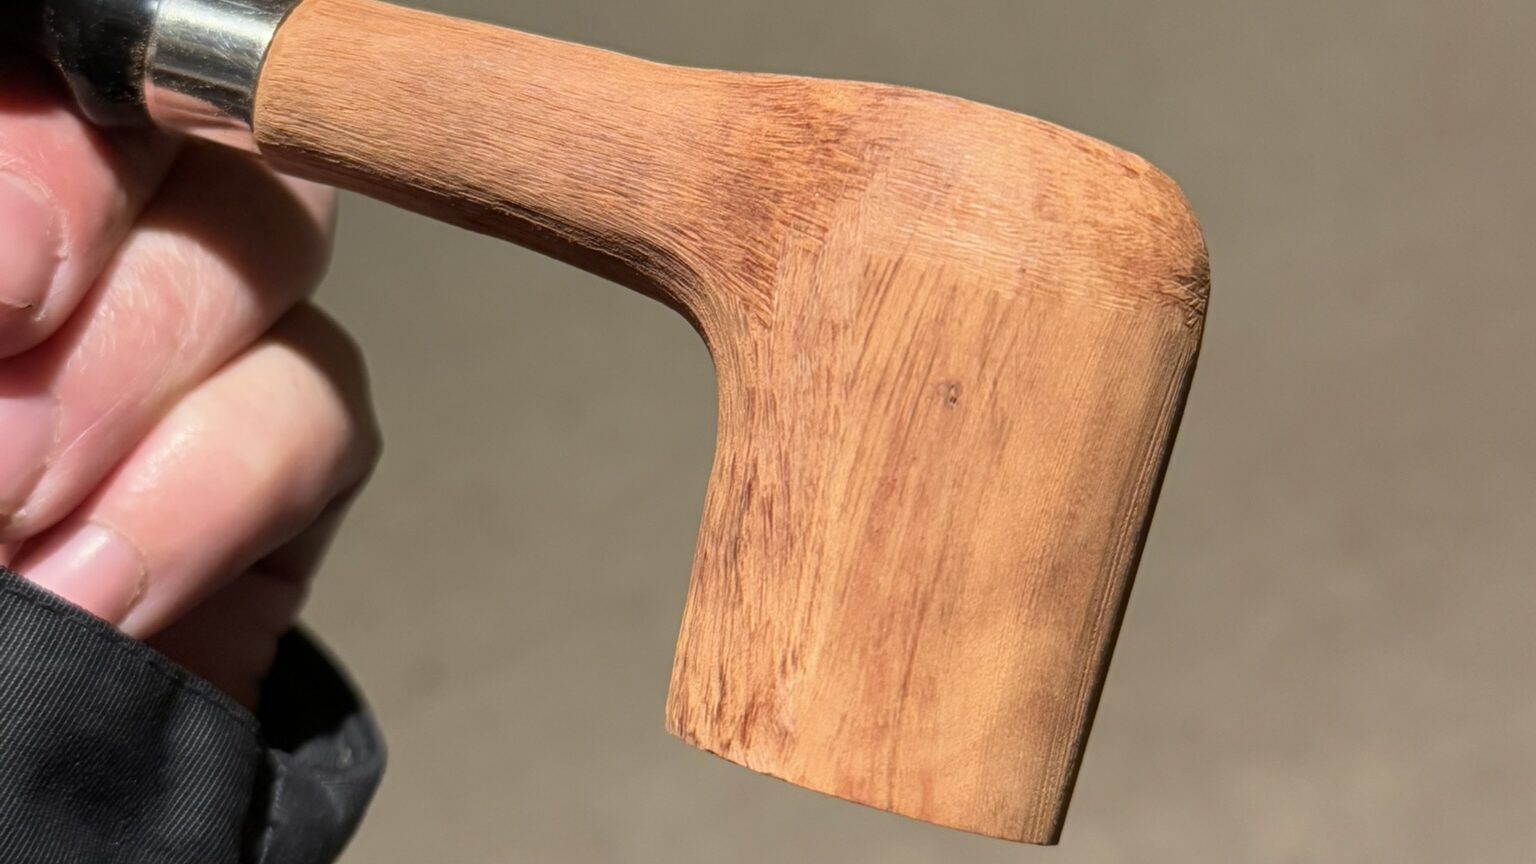
Next I switched over to a sanding drum on the Dremel (I think this was 120 grit) to shape the stummel more finely and start getting the shape down so that the shank matched the mouthpiece width better and so that the pipe had more of a proper shape. Once again, this is something I’ll have to experiment with, as although the drum did a great job and removing the right amount of material, it was very easy to scorch the briar.
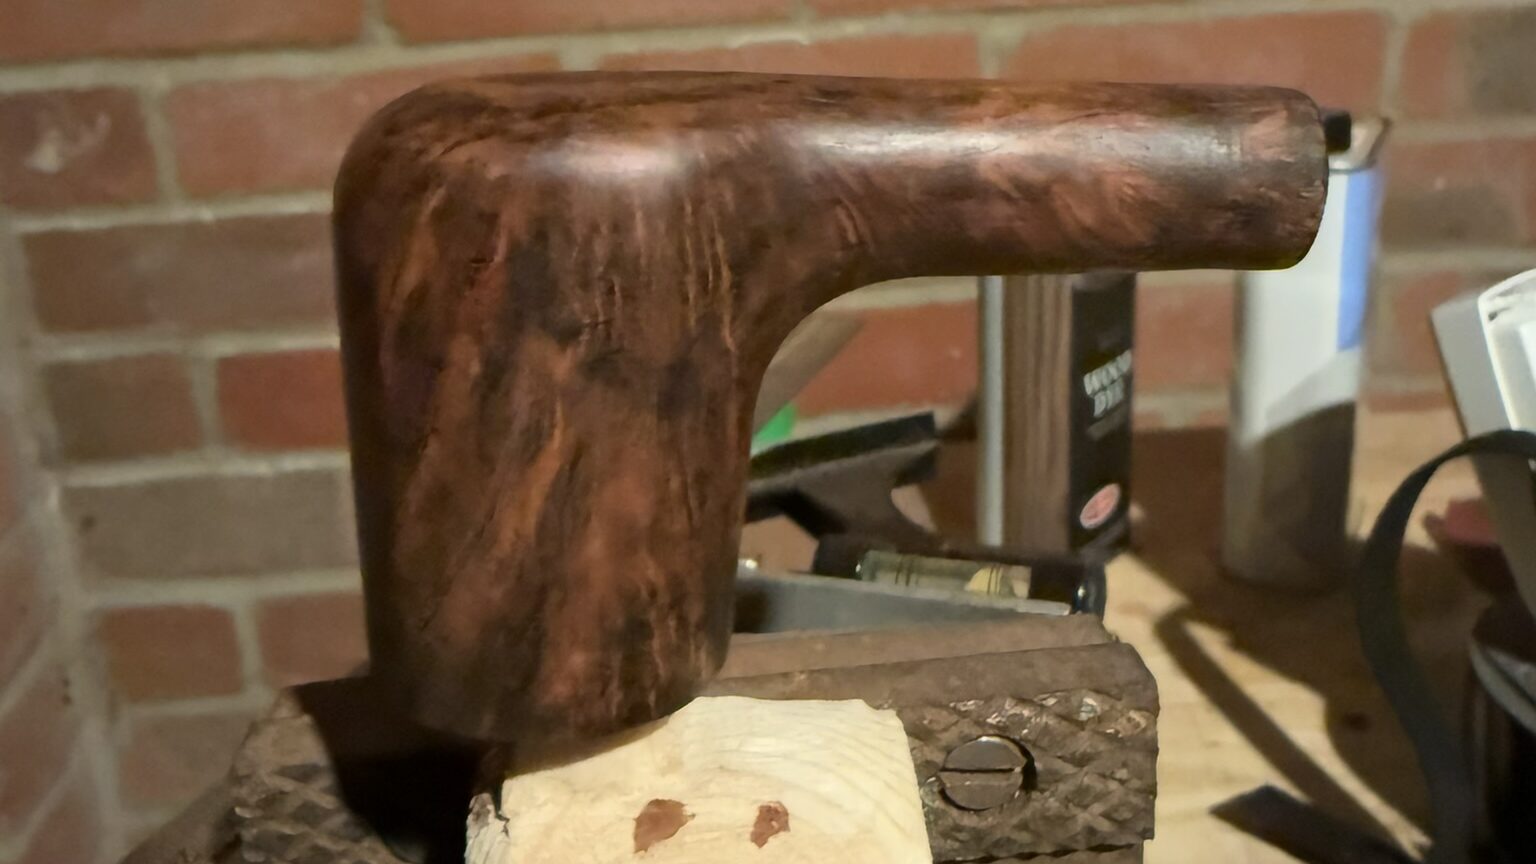
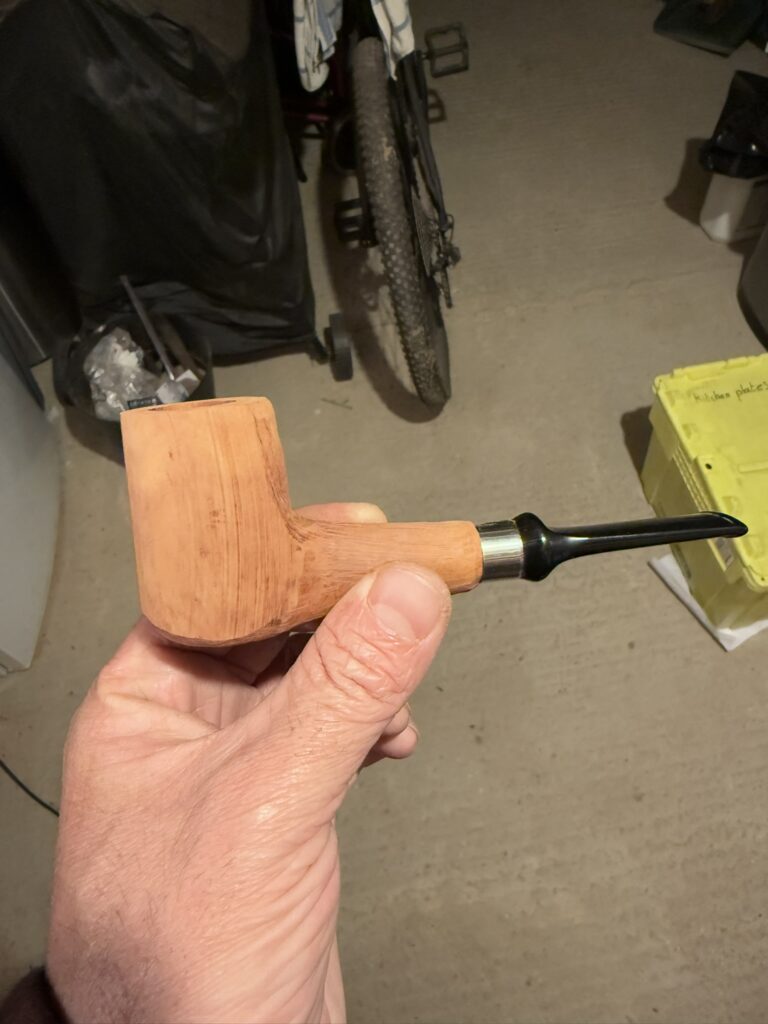
Then was the finishing stage. I sanded to stummel up to 600 grit before covering with a couple of coats of dark brown stain. Once this has dried and sanded it back again with 600, lightening up the softer parts of the grain. Then I coated it with a layer of Deep Mahogany stain before sanding up to 1000 grit and oiling with Danish oil. The final part of the finish was applying some carnauba wax. Note to self; wear gloves in future.
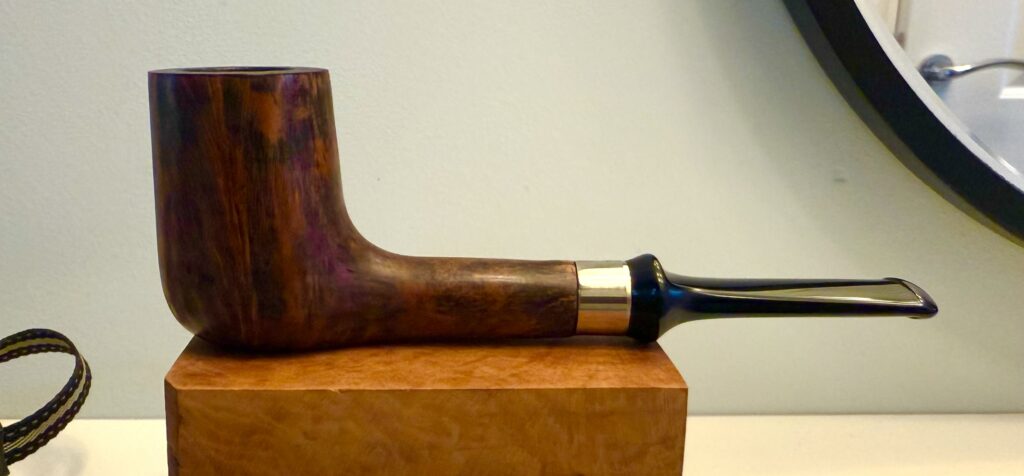
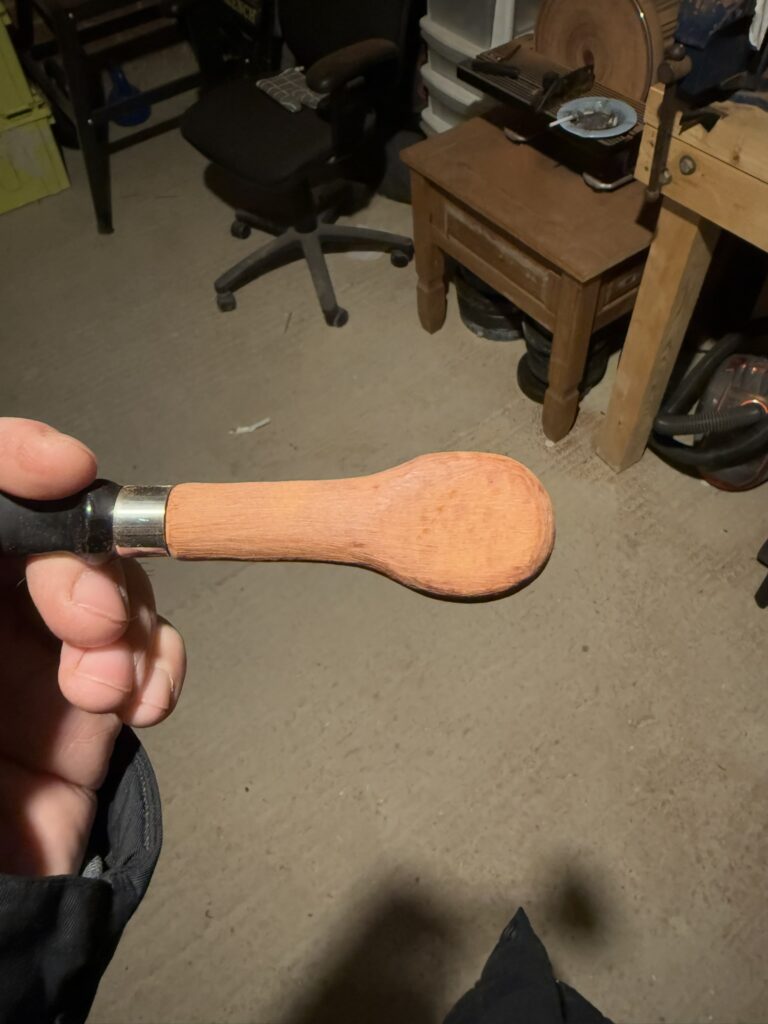
And here is the finished piece! I know it’s pretty rough compared to the gems a see a lot of more experienced Pipemakers create, but for my first hand-made stummel that was done without a lathe, i’m very happy with it! All that is left it to test it out and see how it smokes.
For my next pipe I am planning a Bent. This will be my first time drilling a bent, so wish me luck!
Leave a Reply